2.22.2011

Homemaker's Tutorial: Coupon Orgainzer

I started this month off with a bang and was posting all the time. But life has gotten very busy in the middle of the semester so once again I am posting infrequently. But. Back to
The Homemaker's Month of Helpful How To's

Today I have an awesome tutorial to share with you!!!

It's an adorable coupon organizer.
I got the original idea HERE and then made a few little changes of my own.


This tutorial and organizer would be a perfect companion to your homermaker's handbook!
See my tutorials on how to make a homemaker's Handbook HERE.
{I made my coupon organizer match my handbook}


If you follow her tutorial then you will end up with an adorable and functional coupon organizer!!

I on the other hand wanted to make things more complicated for myself.
Here it my version.


I wanted to make my organizor bigger so that I could add 8 1/2" by 11" baseball card inserts to store all my coupons. I don't know about you but I have WAAY too many coupons to fit in a pocket :)

{Please keep in mind this in only my second sewing project I have ever completed!! And the first one was in a sewing class! lol}

Directions:
Go to 2 Little Hooligans tutorial HERE and follow her amazing step by step directions on how to make this adorable coupon organizer.  

Here are the things I changed. Go to her tutorial and follow along.

For the main color of fabric which is the red and black flowers. I changed the following:
1. Hooligans used: 14" x 8 1/2" *I Used: 241/2" x 13 1/2" (inside of organizer)
2. Hooligans used: 13" x 8 1/2"   *I Used: 23" x 13 1/2" (outside of organizer)
3. Hooligans used: 9" x 8 1/2"  *I Used: 19 x 13 1/2" (inside pocket)

For the Second color which is the black swirls I changed:
1. Four pieces of fabric at 4 1/2" x 8 1/2" (zippered pouch) {I used the same as I had only baught a 7" zipper.
2. Hooligans used: 21" x 2 1/2"   *I Used: About 30" x 2 1/2" (elastic closure)
3. Hooligans used: 6 1/2" x 12"  *I Used: 22" 13 1/2" (pocket for pad and pen)


I then followed her directions the same and just used my larger pieces. When I got to the end where all the pieces are sewn toether I attached my other pieces.

After the two largest pieces are sewn together and an opening was left in the top to pull the pieces right side out I did a couple things.

1. I took a three ring binder and cut it apart so all I was left with was the three ring metal pieces. I covered this in fabric.

Then in the opening left in the top of the organizer I insirted the three ring metal piece into the center and sewed up and down it into place.

2. After these pieces had been sewed in I had every intention of following the tutorial and just sew it up but because it is so large it was too floppy. So I took the two cardboard pieces I had cut out of original normal binder and inserted them into the sides.
Then I sewed it up like normal.


3. With my new snazzy three ring piece in place I can add pieces of paper or baseball card inserts that I plan on putting in to organize all my coupons. For now I have these dividers in place.

It matches my Homermaker's Handbook! Love it!!
Fidn my handbook tutorial HERE

So I totally made this up as I went along and some things could probably have turned out better.

So if you have any sort of version of this please please please let me know! Share a link, picture, or just some tips.

Thanks :)

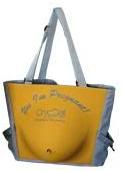
Free Belly Bag

This post brought to you by CryoCell International. All opinions are 100% mine.

Are you pregnant and looking into how to best welcome your new little one into the family?

Cryo-Cell has some great information on innovative Stem Cell banks. 

www.Cryo-Cell.com

On their website you can browse the latest medical information and read material from leading medical professionals. Their site explains all the reasons why it's time to invest in your baby's core blood bank.

And if you log in today you can receive an information packet and adorable belly bag for free!  

www.Cryo-Cell.net

So if your expecting a little one or know someone who is then check out Cryo-Cell today! And invest in your baby's future! 

Visit Sponsor's Site

2.16.2011

Homemaker's Month: Sewing and Crafting Pushed to NEXT Week

This week for the Homemaker's Helpful Month of How To's we are supposed to go over some fun crafts and sewing projects.

However my hubby is in the middle of trying to launch a site and all my extra time has been going in to helping him launch. I've been busy figuring out the web design and all that.

So I'm pushing back Week #3 of the homemaker's month until next week.

So come back on Monday Feb. 21 for some fun tutorials :)

2.14.2011

Homemaker's Recipe's: Valentine's Day Cupcake Bites

Welcome back for the last day of the Homemaker's Recipes week of
The Homemaker's Month of Helpful How To's 

Find this recipe now at my new home: Young Wife's Guide
Red Velvet CupCake Bites


2.12.2011

Homemaker's Handbook: Favorite Recipe Download

Welcome back Ladies! We are in week #2 of the
Homemaker's Month of Helpful How To's!

This week we have been covering some fun recipes. I have been a little busy and have only had a chance to get two recipes up so far. But more are coming!

#1: Andes Mint Cake..Yuuum! Find it HERE

#2: Our very favorite Spinach-Artichoke dip! Find it HERE

Later this week  {Hopefully tomorrow} I will have a FUN Valentine's Day Recipe for some special cupcakes, feature some of YOUR favorite VDAY recipes and hopefully have a giveaway for you all :) Stay Tuned!

Today however I have a fun download for you.

Last week we covered the Homemaker's Helpful Handbook!
Go HERE to catch up and read all about it.

So today I will cover my recipe section.

In my recipe section I have either copied or typed out some of my favorite recipes. This makes it so easy when I'm doing my menu planning to pull out my handbook and pick a few of our favorites.

So I decided I needed a handy way to look at our favorite recipe's without flipping through each one.

So here is our Top 20 Favorite Recipe's List
I keep this in the front of our recipe section.

This little list works wonders! Do you keep track of all your favorite recipes?

2.10.2011

Homemaker's Recipes Day #2: Spinach-Artichoke Dip

Welcome back after a few days break for Week two day two of the
Homemaker's Month of Helpful How To's

Today is one of our favorite recipe's! I make this anytime we have something fun going on!

We love spinach artichoke dips and this recipe has developed from a few recipes.

Day #2


Spinach-Artichoke Dip

Ingredients:
  • 1 (14oz) can artichoke hearts, drained, chopped
  • 1 (0oz) pkg frozen spinach, thawed & drained
  • 3 cups of shredded mozzarella (If you want to be healthier limit this to 1 cup)
  • 1/2 cup grated parmesan cheese
  • 1/2 cup Mayo
  • 1 garlic clove minced {I found one garlic waaaay too much for me so I substitute some garlic powder instead but hubby loved the garlic.}
Directions:
  1. Heat overn to 325 F. In an oven safe dish combine all the ingredients and mix thoroughly together.
  2. Bake for 20 to 25 minutes or until the top is bubbly and golden brown and the dip is heated through.
It's that simple! Our favorite thing to eat with this is tortilla chips but sliced bread is wonderful as well!
Do you have a favorite spinach-artichoke dip? Or another dip favorite?

2.07.2011

Homemaker's Recipes Day #1: Andes Mint Chocolate Cake

Welcome to Week #2 of the
Homemaker's Month of How To's

If you missed last week on the Homemaker's Handbook then go HERE to catch up.

This week will be dedicated to recipes and other fun cooking goodness!

At the end of the week I'll set up a linky so that we can all share our recipes and meet some new friends. I'm giving you fair warning this week unlike last week :)

So first up this week is our favorite cake of all time.
Some may say this is more of a holiday cake but my family loves mint and we will eat it any day!

Andes Mint & Chocolate Cake
Ingredients:
1 devils food cake mix
   water
   vegetable oil
   eggs
16 oz. non-dairy whipped topping
1 package (8 oz.) cream cheese (softened)
1 pkg. (8 oz.) Andes Crème de Menthe Thin

Directions:

Cake:

Follow mixing instructions on the package of your favorite devils food cake mix. 
I chopped up a bunch of the mints (Maybe 1/2 to 3/4 of cup) and mixed it into the cake mix. 
Bake as directed for two 8 or 9-inch layers. Cool cakes thoroughly before frosting (about 40 minutes).
Meanwhile, with a vegetable peeler shave along side of each mint lengthwise to equal about ½ cup of curls. (It’s common to shave only half the mint before it breaks.) Set aside curls for sprinkling on top of assembled cake. Chop broken pieces and reserve for use in frosting (about 1/3 cup). 

Frosting:

In a large mixing bowl with mixer on medium speed, beat the cream cheese until smooth then lower the speed and slowly mix in the non-dairy whipped topping with the cream cheese. Fold the Andes Crème de Menthe pieces into the cream. 

Place one cake layer on a serving plate; top with half the frosting and spread evenly.

Place second layer on top and use remaining frosting to top the cake. Sprinkle top with Andes Mint curls. Cover and refrigerate cake if not serving right away. 


I made this for my brother in laws 21st birthday! Happy Birthday Jean-Marc :)

I got the recipe from HERE and this is what the cake is supposed to look like but I wanted frosting on all of it :)


2.05.2011

Homemaker's Handbook Link Up!

It's time for the Homemaker's Handbook Link up!

This week we have covered so much! 
From how to assemble the binder to free downloads to put inside. 
See all this weeks posting HERE

But now it is your turn to show us what you have come up with! 

Show off your handbooks or downloads or lists or any other fun things you have come up with. 

We love to be creative but sometimes we just really need some inspiration from others! 

So Ladies, lets (show off just a little) and inspire each other. 

Link to a post or photo and let us know how your daily life works. 

So grab my button and link back to us on your site so others can show off their handbooks as well! 

Homemaker's Month of Helpful How To's

Homemaker's Handbook #3: Meal Planning & Shopping List {Downloads!}

Welcome back for the third day of the
Homemaker's month of Helpful How To's

For Day #3 of the Homemaker's Handbook I have some more free downloads for you!

If you are just joining us this week then see the following links to catch up!

Introduction to the Homemaker's month of How To's {HERE}

How to assemble {And make pretty} your Homemaker's Helpful Handbook {HERE}

What Goes Inside: Calendars and Budget Forms-Free Downloads {HERE}

Now we are on to my next section.

Meal Planning

This is my second most important section of my handbook!
I have taken note from some of the great bloggers about doing a meal plan and I.Love.It!

I have been doing a weekly meal plan now for about a year and I can't imagine what I did before.

So this is what I use: Meal Planning


I sit down every Sunday and plan out the meals for the week. My husband loves this because I try to make one recipe a week. So I let Hubby get my cookbooks out and pick out a new meal he would like. 
I love our system because my job is easier and quicker and hubby gets to pick out some yummy food. Plus if the recipe is no good then it's not my fault! hahaha

This is the shopping list then that I use to go with my meal planner. 
I fill it out at the same time as my meal planning.
This is a combination then of the meal planner and shopping list on the same page.

Here is also a list of other great bloggers who offer free downloads of meal planners and shopping lists:


1. MoneySavingMom has 11 different downloads for meal planning! Plain, Simple and Ready to Print!  Check them out HERE 
2. MyComputerIsACavas has a wonderful idea! She took a created file and turned it into a really cute hanging for her kitchen! Find the tutorial HERE  ADORABLE!

3. Okay TipJunkie has done it again! This shopping list is adorable!!! Find it HERE
4. Another great meal planner from FamilyFun.com. Download yours HERE 
5. Tippy Toes has another great one. Colorful! Find it HERE

Do you have your own version of meal planner to use? Share it with us!

Link up today to show off your Homemaker's Handbook. 

2.03.2011

Homemaker's Handbook Day #2: Calendar's & Budget Forms-Free Downloads!

Welcome back for the second day of the
Homemaker's Month of Helpful How To's

Before we get into today's fun, I want to give all of you a chance to show off your homemaker's handbooks.

We are all unique and our lives are all very different so our handbooks of our daily lives will all look different!

To encourage us all I want you all to share your handbooks.

On Saturday {2/5} I will have a link up ready so we can all show off our handbooks.

I want to show off the simple and organized to the beautiful and helpful. So create a post and share with us all your homemaking handbook!

Link up will be open on Saturday {Sorry for the late notice}.
Grab my button on the side to add it to your page for the link up.

So back to today.
Day #2 of the Homemaker's Helpful Handbook week #1.

Yesterday we covered how to assemble your handbook if you want to go a little fancy and yet still keep your great organizer clean and wet free!
 See yesterday's post HERE.

Today we will begin to cover what goes inside your handbook.
Now each of our lives are different so you will need to determine what actually makes your life simpler and less cluttered. The whole point with this handbook is to help us and not hinder us because it creates more work.

1) Financial Section
This is the section that really bore my handbook. I needed to be able to print my budget and tracker each month to really keep tabs. Now at the beginning of each month the Hubby and I get out the calendar and budget out our month.

What's inside my Financial Section
A) My Monthly Calendar
I made a monthly calendar to print and record each month's expenses.
But you could also use these as an everyday calendar.

Here are my calendars that I use and can be printed in full color.

Go HERE to download the full 12 months of the color calendar.

However I know many of you will want to save money on ink so here are the same ones but the calendar is white. Easy to print in black and white and still have some cute calendars.

Go HERE to get to the Black and White Calendar Collection

Here is an example of how I fill them out.
Click on picture to make larger
My budget would not work without this written calendar.

At the beginning of each month I write out all my bills on the day they are due or the day I need to send it, and the amount it is for.

Once the payment has gone through I highlight the item. If the actual amount is different from the amount paid then I write the actual amount below it in red.

This helps so much with knowing where our money is going and when. Then then makes it so easy to track my budget and spending throughout the month.

B) Budget Tracker
This is where my calendar comes in so handy! My husband and I have been following Dave Ramsey's budget and cash plan on and off for about 6 months now.

So with a budget tracker {that I update every Sunday} when it comes time to review the months budget and how well we did everything it is all laid out nicely. This then allows us to set a good working budget for the next month-where we need to reign in spending and where we can loosen a bit.

This is how I fill it out:
{Click picture to make larger}
Go HERE to download my Budget Tracker

Here are also some great resources for free calendars and budget worksheets
1. Dave Ramsey's Monthly Cash Flow Worksheet-Find HERE

2. Dave Ramsey's Basic Quickie Budget Worksheet-Find HERE

3. MoneyFunk.Net has a list of 7 free printable budget worksheets that look great-Find HERE

4. Simple & Plain Printable Calendars-Many different styles-Find HERE

5. Graphic Garden has some really adorable calendars to print-Find HERE
Example Calendar from Graphic Garden

5. Microsoft has templates you can download right into word or excel for calendars-Find HERE

C) Username and Passwords
This is a section that not every would like to have in their binder.
If for example, you plan on taking this binder with you grocery shopping then please leave this section out.

I do not however plan to take this binder out of my house or even out of my kitchen where I keep it. I do not though keep very sensitive passwords such as my bank account or paypal.

And if I need the password in it but it is of the more sensitive nature than I will abbreviate the password to something I would know.

For example if I had a password that was Godreigns4ever then I would simply write GR4E and hope I remember what that means when I get to it.

I do not have a sample for you of this list but I simply typed up a new line for each item.
For Example

Electric Company-Username:               Password:                   Manual or Automatic Payment

This system really helps when my husband is trying to order something from Amazon or pay the electric bill for me. I cannot always remember the username and passwords unless staring at the screen typing it in. This allows my husband to pick up the binder and order!

So help us all out.
Do you use a Financial Section in your binder?

What do you include? Any hints or tricks? Links to free printables is always welcomed of course :)

Thanks for tuning in to Day #2 of the Homemaker's Handbook.

Check back later this week for more links and printables for organizing your binder.

LinkWithin

Related Posts with Thumbnails